Group the Devices
When NovAtel Application Suite is installed, the ALL group is the only group available. This group contains all of the Devices added.
The added Devices can be organised into additional groups to make it easier to find Devices or to put similar Devices in a single location.
Add a Group
To add a group:
-
Click the

The New Group dialog box displays.

-
In the Group Name box, enter a name for the group.
-
Click the Add button.
The Devices window changes to show the new group and a new group icon (folder icon) is added to the left side of the window.
Open a Group
All of the groups available on the Devices window are shown on the left side of the Devices window. Each group is represented by a folder icon )
)
To open a group, click the folder icon for the group. The Devices window changes to show only the devices that are in the selected group.
Add a Device to a Group
To add a new Device to a group:
-
Click the Add Device button.
The New Connection dialog box opens.
-
Enter the Device information.
See Add a Device – Serial Connection, Add a Device – USB Connection or Add a Device – Ethernet Connection for information about adding a Device.
Change the Devices Assigned to Group
To change the Devices in a group:
-
Click the folder icon for the group.
The Devices window changes to show the Devices currently in the group.
-
Click the menu button
 )
)A dialog box appears showing the Devices available to add to the group.
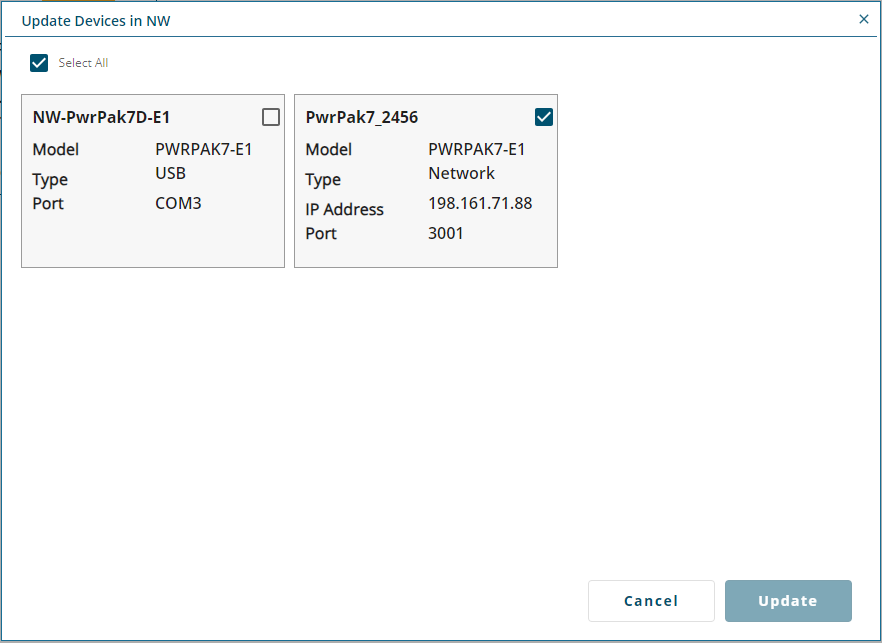
Devices that are already in the group have the check box selected.
-
To add a Device to the group, select the check box for the Device.
To remove a device from the group, clear the check box for the Device.
To select all available Devices, select the Select All check box.
-
Click the Update button.
Remove a Device from a Group
To remove a Device from a group:
-
Click the folder icon for the group.
The Devices window changes to show the Devices currently in the group.
-
Click the menu button
) -
Click Remove from Group.
A confirmation dialog box appears.
-
Click the Yes button.
Removing a Device from a group does not delete the Device from the Devices window.
Change the Group Name
To change the name of the Group:
-
Click the menu button
) -
Click Edit Group.
The Edit Group dialog box appears.
-
In the Group Name box, enter the new name for the group.
-
Click the Edit button.
Delete a Group
To delete a group:
-
Click the menu button
) -
Click Delete Group.
A confirmation dialog box appears.
-
Click the Yes button.