Position Overview
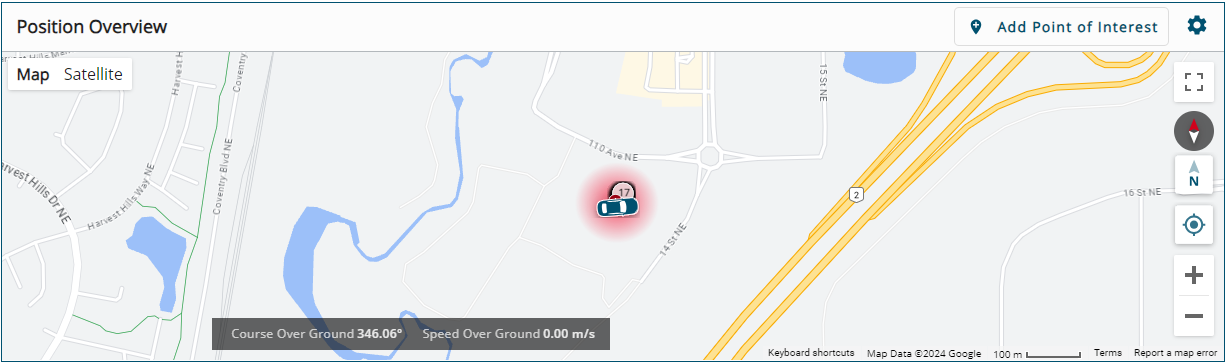
The Position Overview window contains a map that shows the current position of the receiver, a history of where the receiver has traveled, information about the receiver's course and information about the locations around the receiver.
The Position Overview window can be shown in Map view or Satellite view.

To change what is visible on the map:
-
Click the Satellite button to change the Position Overview window to show the satellite view.
-
Click the Map button to change the Position Overview window to show the map view.
-
Click the + button to zoom the map in.
-
Click the - button to zoom the map view out.
-
Click the Full screen button
 )
) -
Click the Normal screen button
 )
) -
Click and drag on the map to change the portion of the map that is visible.
On the Position Overview map there can be several icons to provide information about the receiver and its position.
|
Icon / Label |
Description |
|---|---|
|
|
Current position marker The current position marker shows the current position and heading of the vehicle in which the receiver is installed. There are several markers available to represent the vehicle. |
|
|
History marker The history markers show the positions where the receiver has been. The amount of time that history markers remain on the Position Overview map can be changed. |
|
|
Error marker The error markers show the position of the vehicle when an error event occurred on the receiver. |
|
|
Warning marker The warning markers show the position of the vehicle when a warning event occurred on the receiver. |
|
|
Points of interest are locations that have significance to the monitoring of GNSS interference. For example, it may be a location with reduced signal availability, high multipath or a known interference source. To add a point of interest, see Add a Point of Interest. |
|
|
Trigger marker The trigger markers show the position of the receiver when an Event input was received. Triggers must be configured before they will be added to the Position Overview map. |
|
|
Compass The red arrow of the compass indicates the direction of North on the Position Overview map. |
|
|
Center on position Click this icon to change the map view so the receiver is at the center of the map. |
|
|
North up When this icon is visible, the Position Overview map is oriented so north points up. The map orientation does not change based on vehicle track. Click this icon to change to Track up orientation. |
|
|
Track up When this icon is visible, the orientation of the Position Overview map changes so the direction of vehicle travel (track) points up. The compass symbol on the Position Overview map adjusts so the red arrow points north. Click this icon to change to North up orientation. |
|
Heading |
The current heading of the vehicle in degrees. The heading is the angle from True North of the base to rover vector in a clockwise direction. The receiver must have ALIGN configured before a heading value is shown on the map. |
|
Course Over Ground |
The current course over ground of the vehicle, in degrees. This is the actual direction of motion over ground with respect to True North, in degrees. |
|
Speed Over Ground |
The current speed of the vehicle relative to the course over ground. |


Add a Point of Interest
To add a point of interest:
-
Click the Add Point of Interest button.
Alternately, right click a location on the Position Overview window and click Place Point of Interest here.
The Add Point of Interest window appears.

By default the map displays in map view. To change the map to satellite view, click the Satellite button.
-
In the Point Name box, enter the name for this point of interest.
-
Optionally, in the Point Radius box, enter the radius in metres for the circle that defines the size of the point of interest. This radius is used to determine when a receiver enters or exits a point of interest. The area defined by this radius is shown as a circle around the point of interest on the map view
-
Enter the location of the point of interest.
-
To use the current position of the receiver, click the Use Current Position option.
-
Enter the latitude and longitude of the location in the Latitude and Longitude boxes. The latitude and longitude are entered in decimal degrees.
-
Click on the location of the point of interest on the map.
If the Point of Interest was added by right clicking on the Position Overview window, the Latitude and Longitude boxes contain the values for the selected location.
-
-
Select one of the notification options to determine when a notification is generated for this point of interest. A notification can be sent when a receiver enters (On entry) or leaves (On exit) the point of interest. When None is selected, the notifications are turned off for this point of interest.
-
Click the Add button.