Logging Control Window
The Logging Control Window is a tool used to initiate a logging session.
To open the Logging Control Window, click  .
.

Refer to Tools buttons to resize the Logging Control Window.
Add logs
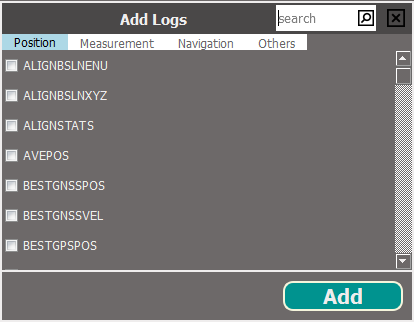
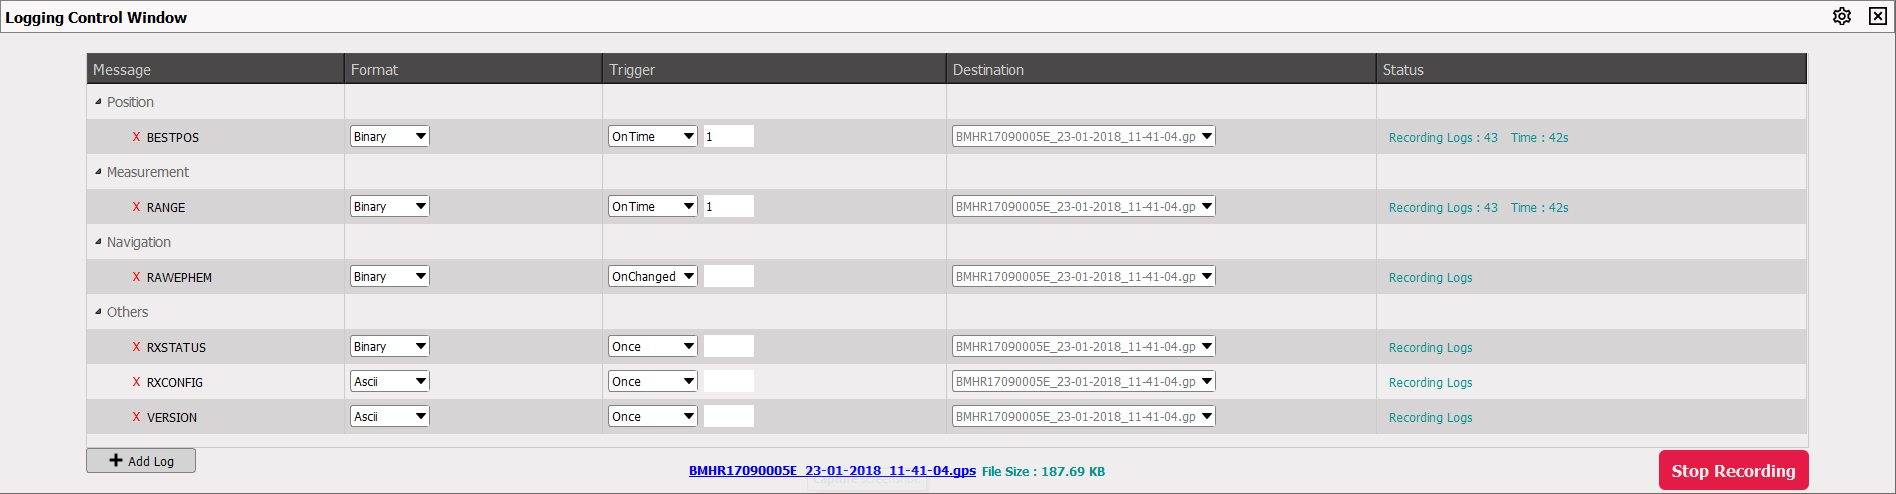
The logs configured to be recorded are shown on Logging Control Window. The logs are sorted by the following categories.
-
Position
-
Measurement
-
Navigation
-
Others
Add logs by pressing the + Add Log button and selecting logs from the list. You can search the list for a particular log using the search text box. The search starts as soon as text is entered. The search works within the selected tab, so if the log is not found, click on the other tabs to search those tabs.
Remove a log
Click the red X beside a log to remove it from the list of logs to record.
Modify the logging parameters
Each log on the Logging Control Window has three parameters that affect how the log is collected.
-
Format
Logs can be generated in Binary or ASCII format.
-
Trigger
The trigger determines the schedule on which the log is collected. The trigger selected depends on the information required and the type of log. If ONTIME is selected, the time period between log recordings, in seconds, must be added in the text box beside the Trigger field.
-
Destination
The destination determines where the log is sent. The log can be sent to any communication port on the receiver, the memory on board the receiver (not available on all receivers) or a file on the computer running NovAtel Connect.
If a communication port is selected, ensure that a device to receive the log is connected to that port.
The file name and directory used when collecting to a file are configured in the Settings dialog box. Refer to Change the log file settings.
Recording
To start recording logs:
-
Ensure the logs you want to record are shown on the Logging Control Window and the logging parameters have been set.
-
Press the Start Recording button to begin recording.
The Start Recording button changes to Stop Recording once recording begins. If the logs are being saved to a file, the window shows the name of the file in which the logs are being recorded and the file size. The progression of the logging is also shown.
Press the Stop Recording button at any time to end log recording.
Change the log file settings
When logging to a file on the NovAtel Connect computer, the file used is determined by the log file settings. To change the log file settings:
-
Click the
 icon in the Logging Control Window.
The Settings dialog box appears.
-
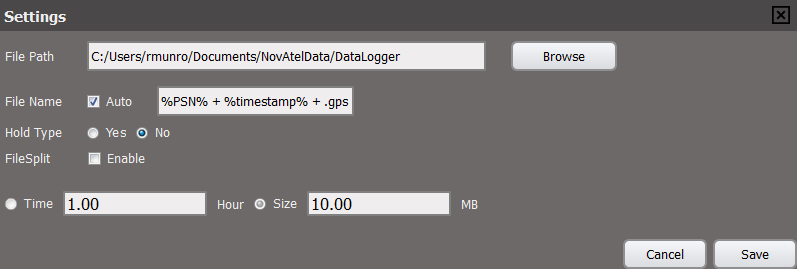
Modify the log file settings.
File Path
The path of the directory in which the log files are stored.
Enter the path directly in the text box or click the Browse button and use the dialog box to select the directory.
File Name
The file name used for the log file.
You can enter a name or allow NovAtel Connect to generate a name.
To enter a file name, clear the Auto check box and enter the name in the text box.
The next logging session will save the logs using the entered name. For subsequent logging sessions, you will be prompted whether you want to replace the existing file or add the new session to the existing log file.To allow NovAtel Connect to generate a unique name for each logging session, ensure the Auto check box is selected. NovAtel Connect will generate a new file for each logging session. The file is named with the product serial number (PSN) and the time when the logging session started.
Hold Type
Enable or disable Hold on the logs started using the Logging Control Window.
When the Hold Type is set to No, the logs started using the Logging Control Window can be unlogged when an UNLOGALL command is sent.
When the Hold Type is set to Yes, the logs started using the Logging Control Window can not be unlogged when an UNLOGALL command is sent.
Enable File Split
If a large amount of logging data is being collected, the data can be split into multiple files by collection time or file size.
To enable file splitting, select the FileSplit Enable check box and then select Time and enter a value in hours or select Size and enter a value in MB.
-
Click the Save button.