RELAY7 cable routing to SMART7
If using the optional Ethernet cable (SMART7-I NovAtel 01020095), the cable must be inserted through the RELAY7 and then connected to the SMART7 before physically attaching the RELAY7 to the SMART7-I. After the cables are inserted and cables connected, the cable can be routed on the underside of the RELAY7.
The Ampseal interface connector is permanently attached to the RELAY7 and must be connected to the SMART7 by pushing firmly onto the SMART7 Ampseal connector.
Refer to Ethernet cable for SMART7-I (01020095) for cable details.
RELAY7 to SMART7 cable routing
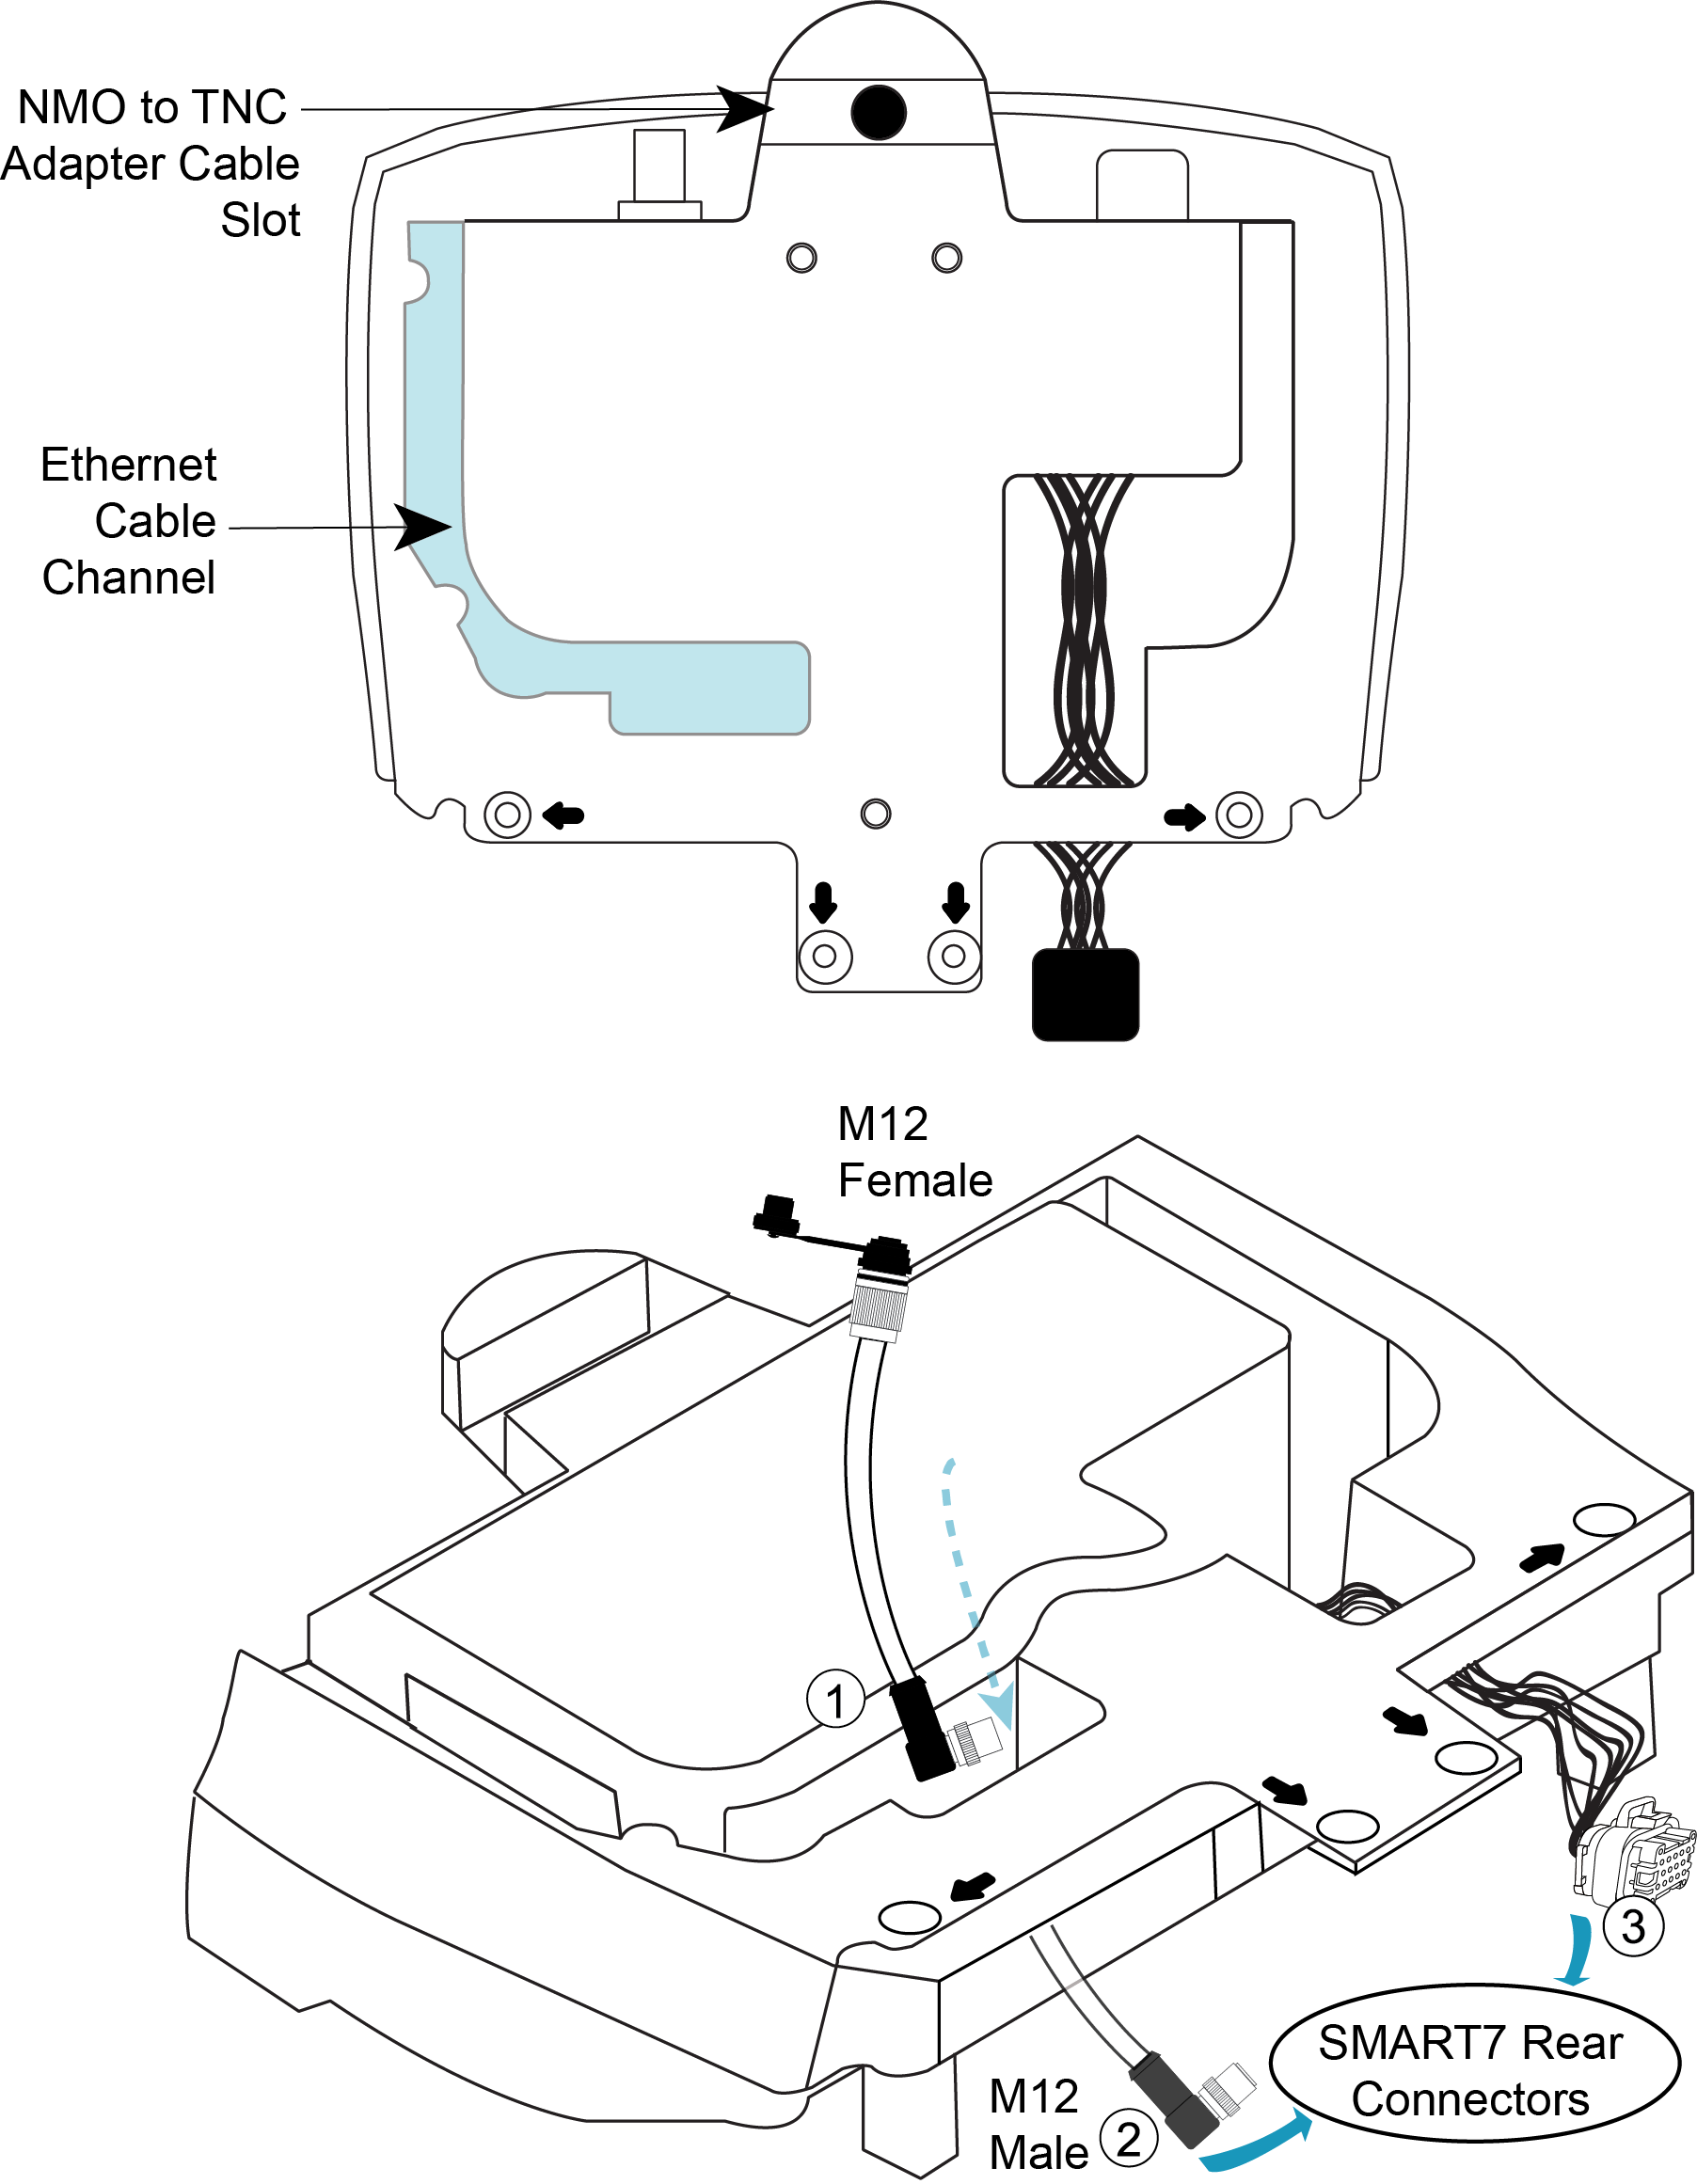
The Ethernet cable is optional (SMART7-I only) and so a cable may not be required. Refer to Ethernet cable for SMART7-I (01020095) for cable details.
-
Insert the M12 Male end of the Ethernet cable down and through to the back of the RELAY7.
-
Connect the M12 Male end of Ethernet cable to the SMART7.
TIP: Tilt the M12 male connector slightly down and then up and forward to insert.
The cable is keyed so it must be properly aligned to tighten. Ensure cable connection is fully tightened.
-
Connect the RELAY7 Ampseal interface cable to the SMART7. If not using the NovAtel interface cable, connect the cabled attached to the vehicle's navigation system.
Refer to Attach and connect RELAY7 to SMART7 for instructions.