Radio configuration
Use the Radio configuration window to configure the radio connected to the receiver.
The settings on the Radio configuration window are saved on the radio module, not on the receiver.
Do not interrupt power while the radio is being configured.
Click the Radio tab to open the Radio configuration window.
If the radio has not been configured, the Detect Radio button displays. Click the Detect Radio button. If the receiver finds a radio, the Radio configuration window displays the type of radio detected and the configuration parameters for that radio.
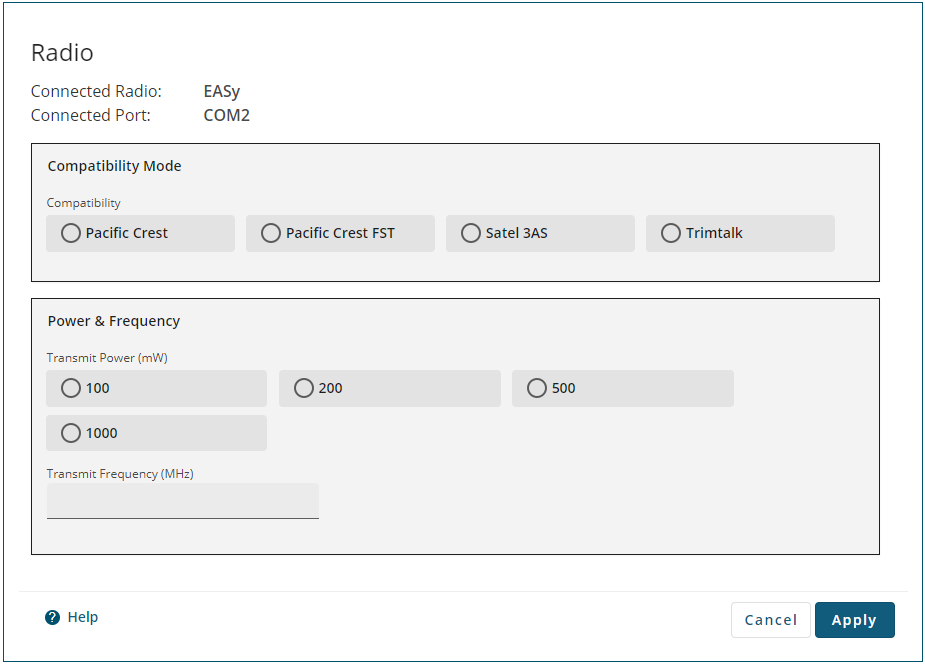
Connected Radio
Displays the type of radio connected to the receiver.
Connected Port
Displays the communication port to which the radio is connected.
The compatibility mode settings vary depending on the radio module installed.
Compatibility Mode (450 MHz)
-
Click the button for the Compatibility (protocol) that the radio will use.
The Modulation options appear. -
Click the button for the modulation the radio will use.
The Link Rate options appear. -
Click the button for the link rate, in bps, the radio will use.
The Channel Spacing options appear. -
Click the button for the channel spacing the radio will use.
The FEC options appear. -
Click the button to enable or disable Forward Error Correction (FEC).
Power & Frequency (450 MHz)
-
Click one of the Transmit Power buttons to select the power at which the radio transmits.
-
In the Transmit Frequency box, enter the transmit frequency, in MHz, the radio will use. The valid frequency range is 403 MHz to 473 MHz.
-
Click the Apply button to save the changes to the radio.
Compatibility Mode and Transmit Power (900 MHz)
-
Click one of the Compatibility Mode buttons to select the protocol the radio will use.
-
Click one of the Transmit Power buttons to select the power at which the radio transmits.
-
In the Channel box, enter the channel number the radio will use.
-
Click the Apply button to save the changes to the radio.