Output Settings – Format
The Format tab provides access to the parameters used to convert the messages.
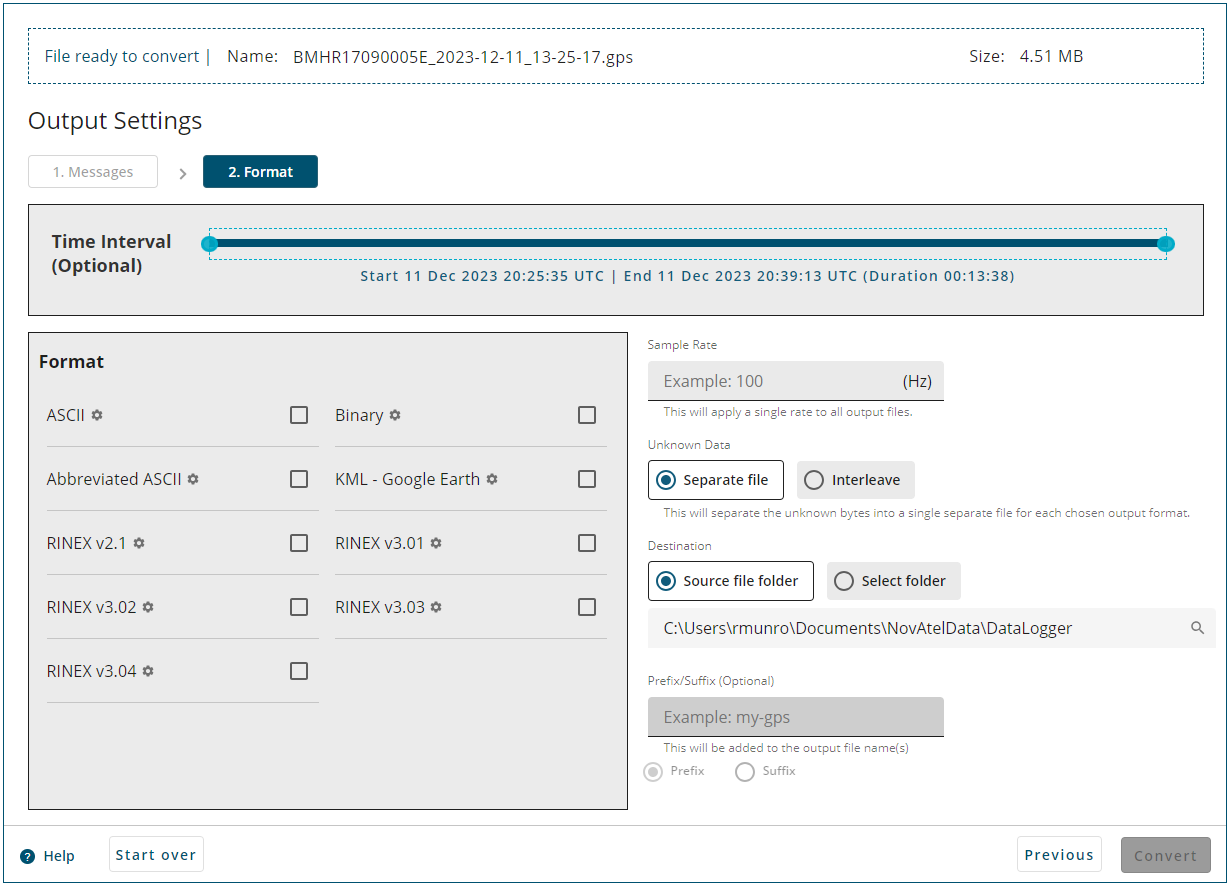
Time interval
When a single file is loaded, the log information to convert can be filtered based on a time interval. To set the time period, use the handles on the slider to set the start and end times. As the sliders are moved, the Start or End times shown below the slider are updated. Only logs within the specified time period will be converted.
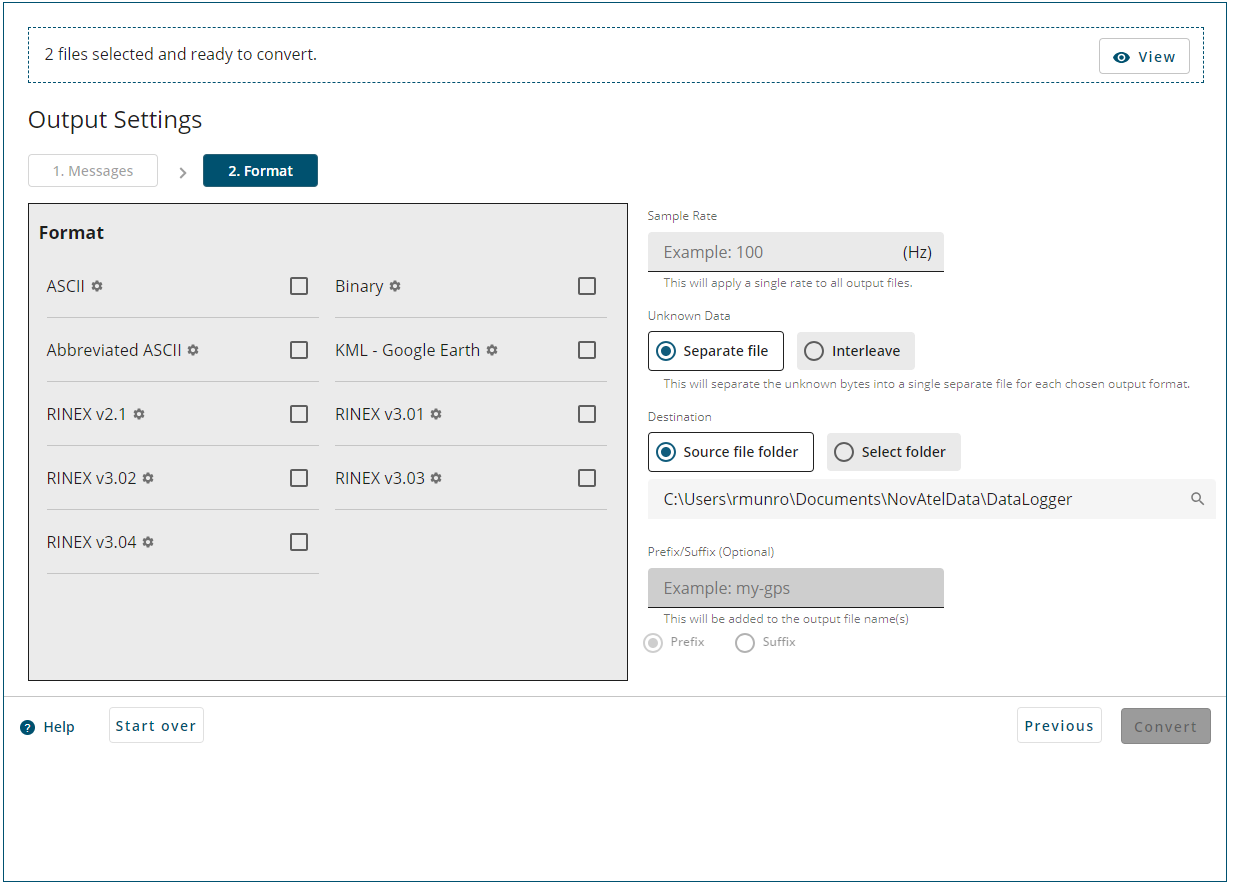
The Time Interval field is not available if there are multiple source files.
Format
In the Format box, select the checkboxes of the formats to which the logs will be converted.
The Convert button is disabled until at least one format is selected.
Conversion to KML format is not supported on all logs.
The following position logs can be converted to KML format: BESTPOS, MATCHEDPOS, RTKPOS, MARKPOS, MARK2POS, MARK3POS, MARK4POS, PSRPOS, PPPPOS, PDPPOS, ROVERPOS, BESTGNSSPOS, MASTERPOS and INSPOSX.
The following velocity log can be converted to KML format: BESTVEL.
File Splitting
If converting the logs to ASCII, BINARY, ABBREVIATED ASCII or KML - Google Earth format, the size of a log file converted can be managed by splitting the output file based on file size, log type or time.
To split the output file:
-
Click the Settings button
 )
)The Format Settings dialog box displays.
-
Select the Enable File Splitting checkbox.
-
Select the method by which the output file will be split.
-
Select Logs to create a separate file for each log type converted. Each output file is appended with the name of the log.
-
Select Size and enter the maximum file size of the converted output file (in MBs) to split the output files by file size.
If the maximum size is reached, Convert will create multiple output files when converting the log file. A suffix ("_Part1", "_Part2", etc.) is added to the name of the output files to indicate the order of the files.
-
Select Daily (UTC) to create a separate file for each day. The date is added to the name of the output files.
-
Select Time and enter the maximum time length (in seconds) to split the output files by time.
If the length of the file exceeds the time entered, Convert will create multiple output files when converting the log file. A suffix ("_Part1", "_Part2", etc.) is added to the name of the output files to indicate the order of the files.
-
-
Click the Apply button.
RINEX Settings
If converting the logs to one of the RINEX formats, the file settings for the output file can be configured.
To configure the RINEX file settings:
-
Click the Setting button
)The Format Settings dialog box displays.
-
To configure Convert to create the resulting RINEX output files as kinematic when converting from other formats, select the Force kinematic data flag checkbox.
The Force kinematic data flag, Use Hatanaka compression and UTC Offset checkboxes are not available for G-III Reference Receivers.
-
To enable Hatanaka compression of the output files, select the Use Hatanaka compression checkbox.
-
To configure the UTC offset from GPS, click the UTC Offset field and enter the UTC time offset.
-
To add comments to the RINEX header, select the text boxes in the Header Information box and enter the information in the text boxes.
-
Click the Apply button.
Sample rate
The number of logs to be converted can be reduced by specifying a sample period that is less than the measurement rate recorded in the input file. For example, if RANGE data is logged at 100 Hz (logged every 0.01 s), it means that there are 100 RANGE logs every second. Specifying a sample rate of 2 Hz, means that only the data at every half second (i.e. 2 logs a second) is converted, thereby reducing the number of RANGE logs in the converted file.
To enter a sample rate, click the Sample Rate and enter a value in Hertz.
If no value is entered, no data sampling is done and all of the selected logs are converted.
The specified sample rate is applied to all of the logs being converted.
Unknown data
Select one of the Unknown Data options to determine how Convert manages any information in the file that is not recognized as a log.
|
Interleave |
Information not recognized as a log is included in the file and labeled UNKNOWN. |
|
Separate file |
Information not recognized as a log is stored in a separate output file. |
The Unknown Data options are enabled only if the log file has unknown data selected.
Destination
The Destination parameters determine the folder in which the converted files are stored.
Source file folder
Select this option to save the converted files in the same folder as the input files. The converted files will be saved in the following folder structure:
InputFile/Source/TimeStamp/Format/FileName
where:
InputFile = the folder in which the input files are stored
Source = the name of source file being converted
TimeStamp = the date and time when the file was converted
Format = the data format the file was converted to (ASCII, BINARY, ABBREV, KML or RINEX)
FileName = the file name of the converted data with the extension ascii, binary, abbrev or rinex depending on the format.
Select folder
Select this option to save the converted files in the folder specified in the text box. To specify the folder, click the search icon and select the folder from the dialog box.
The converted files will be saved in the following folder structure:
SelectedFolder/Source/TimeStamp/Format/FileName
where:
SelectedFolder = the folder specified in the text box
Source = the name of source file being converted
TimeStamp = the date and time when the file was converted
Format = the data format the file was converted to (ASCII, BINARY, ABBREV ASCII, KML or RINEX)
FileName = the file name of the converted data with the extension ascii, binary, abbrev or rinex depending on the format.
ABBREV = Abbreviated ASCII.
Prefix/Suffix
Use the Prefix/Suffix parameters to add a string to the output file name.
To add a prefix or suffix:
-
Click the text box and enter the text to add to the file name.
-
Select the Prefix option to add the text to the start of the file name.
Select the Suffix option to add the text to the end of the file name.
When the Format parameters have been set, click the Convert button to start converting the files.