Connect power to the CPT7
Power can be connected to either the IO1 or IO2 port.
Do not connect a power supply to both ports.
To connect power to the CPT7:
-
Connect the CPT7 I/O1 Cable, CPT7 I/O2 Cable or a custom made interface cable to the CPT7. See CPT7 I/O1 cable or CPT7 I/O2 cable for information about these cables.
-
Connect the bare wires of the I/O cable to a 9 to 36 VDC power supply.
For details about the power supply required, see Power supply requirements for the CPT7.
Ensure the VIN line is connected to the positive pole of the power source and the GND line is connected to the negative pole of the power source.
The CPT7 enclosure must be grounded.
To ground the CPT7, mount the enclosure to a grounded metal mounting plate or attach a chassis ground cable under one of the mounting screw heads.
Fuse for the power supply
Install a user supplied 2 A slow blow fuse in the positive line of the connection to the power source to protect the power supply wiring and your warranty.
Fuse for CPT7 power supply

Power can be connected to either the IO1 or IO2 port.
Do not connect a power supply to both ports.
|
Fuse |
Holder |
|---|---|
|
BK/MDA-2-R Fuse (or equivalent) BK/MDL-2-R Fuse (or equivalent) |
BK/HFA-R Fuse (or equivalent) |
The fuse and holder are made by Cooper/Bussmann; available from Digikey.
Vehicle installation
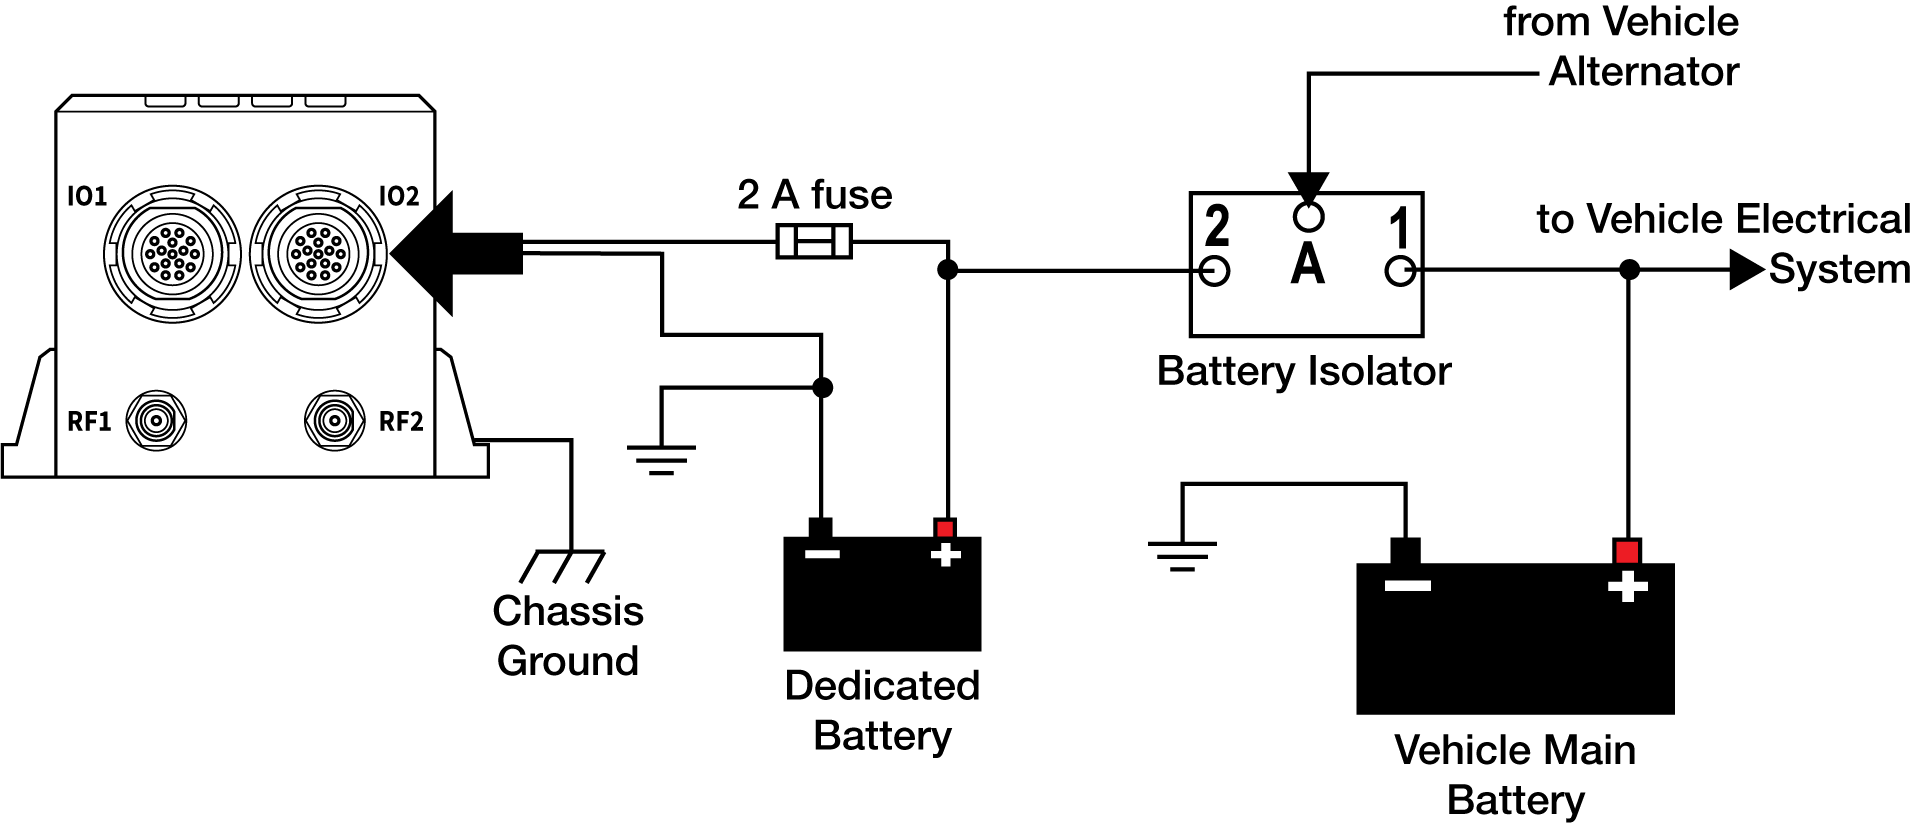
If the receiver is installed in a vehicle, it is recommended that a dedicated battery be provided for the receiver that is isolated from the engine starter battery. When a vehicle engine is started, the voltage on the starter battery can dip below the CPT7 minimum voltage or cut-out to ancillary equipment causing the receiver to lose lock and calibration settings.
Dedicated battery for the CPT7
