Mounting and orientating the SMART2
Mount the SMART2 on a secure, stable structure capable of safe operation in the specific environment.
-
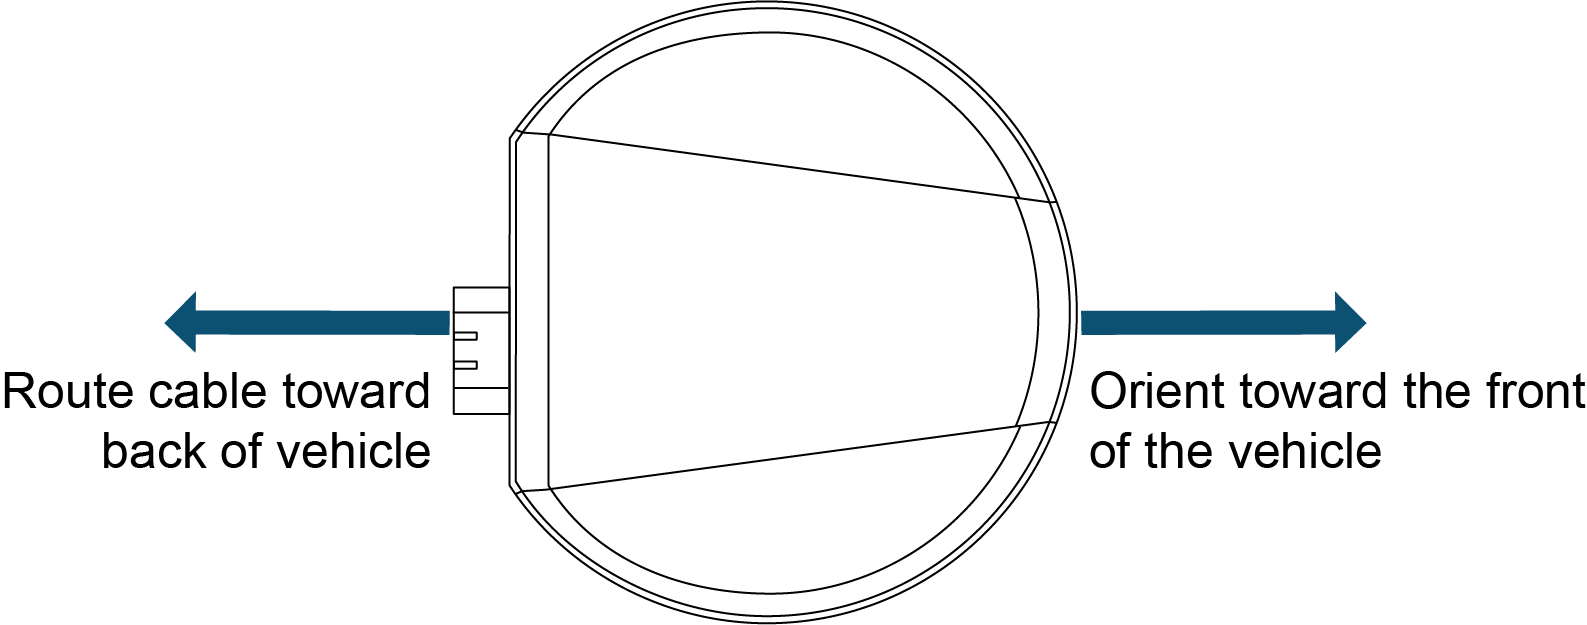
When installing on a vehicle, mount the SMART2 on the vehicle roof, ideally close to the pivot point of the vehicle. The SMART2 must be mounted with the connector facing the rear of the vehicle and the top facing up with an unobstructed view of the sky above and all the way around it.
The SMART2 must be rigidly secured to the vehicle to avoid errors caused by vibration and motion.
-
If installing in a stationary location, mount the SMART2 in a location that has a clear view of the sky so that each satellite above the horizon can be tracked without obstruction.
Orienting the SMART2
The SMART2 can be mounted to the vehicle using the integrated magnets, an optional mounting plate or four M4 screws.
The optimal screw penetration into the SMART2 mounting holes is 6 mm (±1 mm) deep. When selecting screws for mounting the SMART2, ensure the screw penetration does not exceed this specification. Using excessively long screws can damage the SMART2 enclosure.
Mounting plate
Two mounting plates are available to facilitate mounting the receiver:
-
a surface mounting plate
-
a pole mounting plate
Refer to SMART2 mechanical specifications for mounting plate and pole mounting dimensions.
Surface mounting plate
To install the surface mounting plate:
-
Place the SMART2 on the surface mounting plate. The alignment pins on the mounting plate seat in the two of the SMART2 mounting holes.
-
The integrated magnets will hold the SMART2 on to the mounting plate.
To secure the SMART2 to the mounting plate, use two M4 screws that pass through the mounting plate and into the SMART2. Torque the screws to 10 – 12 in-lbs.The optimal screw penetration into the SMART2 mounting holes is 6 mm (±1 mm) deep. When selecting screws for mounting the SMART2, ensure the screw penetration does not exceed this specification. Using excessively long screws can damage the SMART2 enclosure.
-
Attach the mounting plate to the mounting location using the mounting holes at each corner of the plate or the adhesive tape.
Typically, attaching the mounting plate to the vehicle using adhesive tape is only used when SMART2 is magnetically mounted to the mounting plate.
Pole mounting plate
To install the pole mounting plate:
-
Place the SMART2 on the pole mounting plate.
-
Use four M4 screws to connect the mounting plate to the SMART2. Torque the screws to 10 – 12 in-lbs.
The optimal screw penetration into the SMART2 mounting holes is 6 mm (±1 mm) deep. When selecting screws for mounting the SMART2, ensure the screw penetration does not exceed this specification. Using excessively long screws can damage the SMART2 enclosure.
-
Screw the mounting place onto a mount, such as a range pole, tribrach or tripod, with a 1" x 14 thread screw. A 5/8" to 1" bushing adapter is available (NovAtel part number 12023275).