Mounting the SMART7 and RELAY7
Mount the SMART7 and RELAY7 on a secure, stable structure capable of safe operation in the specific environment. Ensure the SMART7 has a clear view of the sky.
-
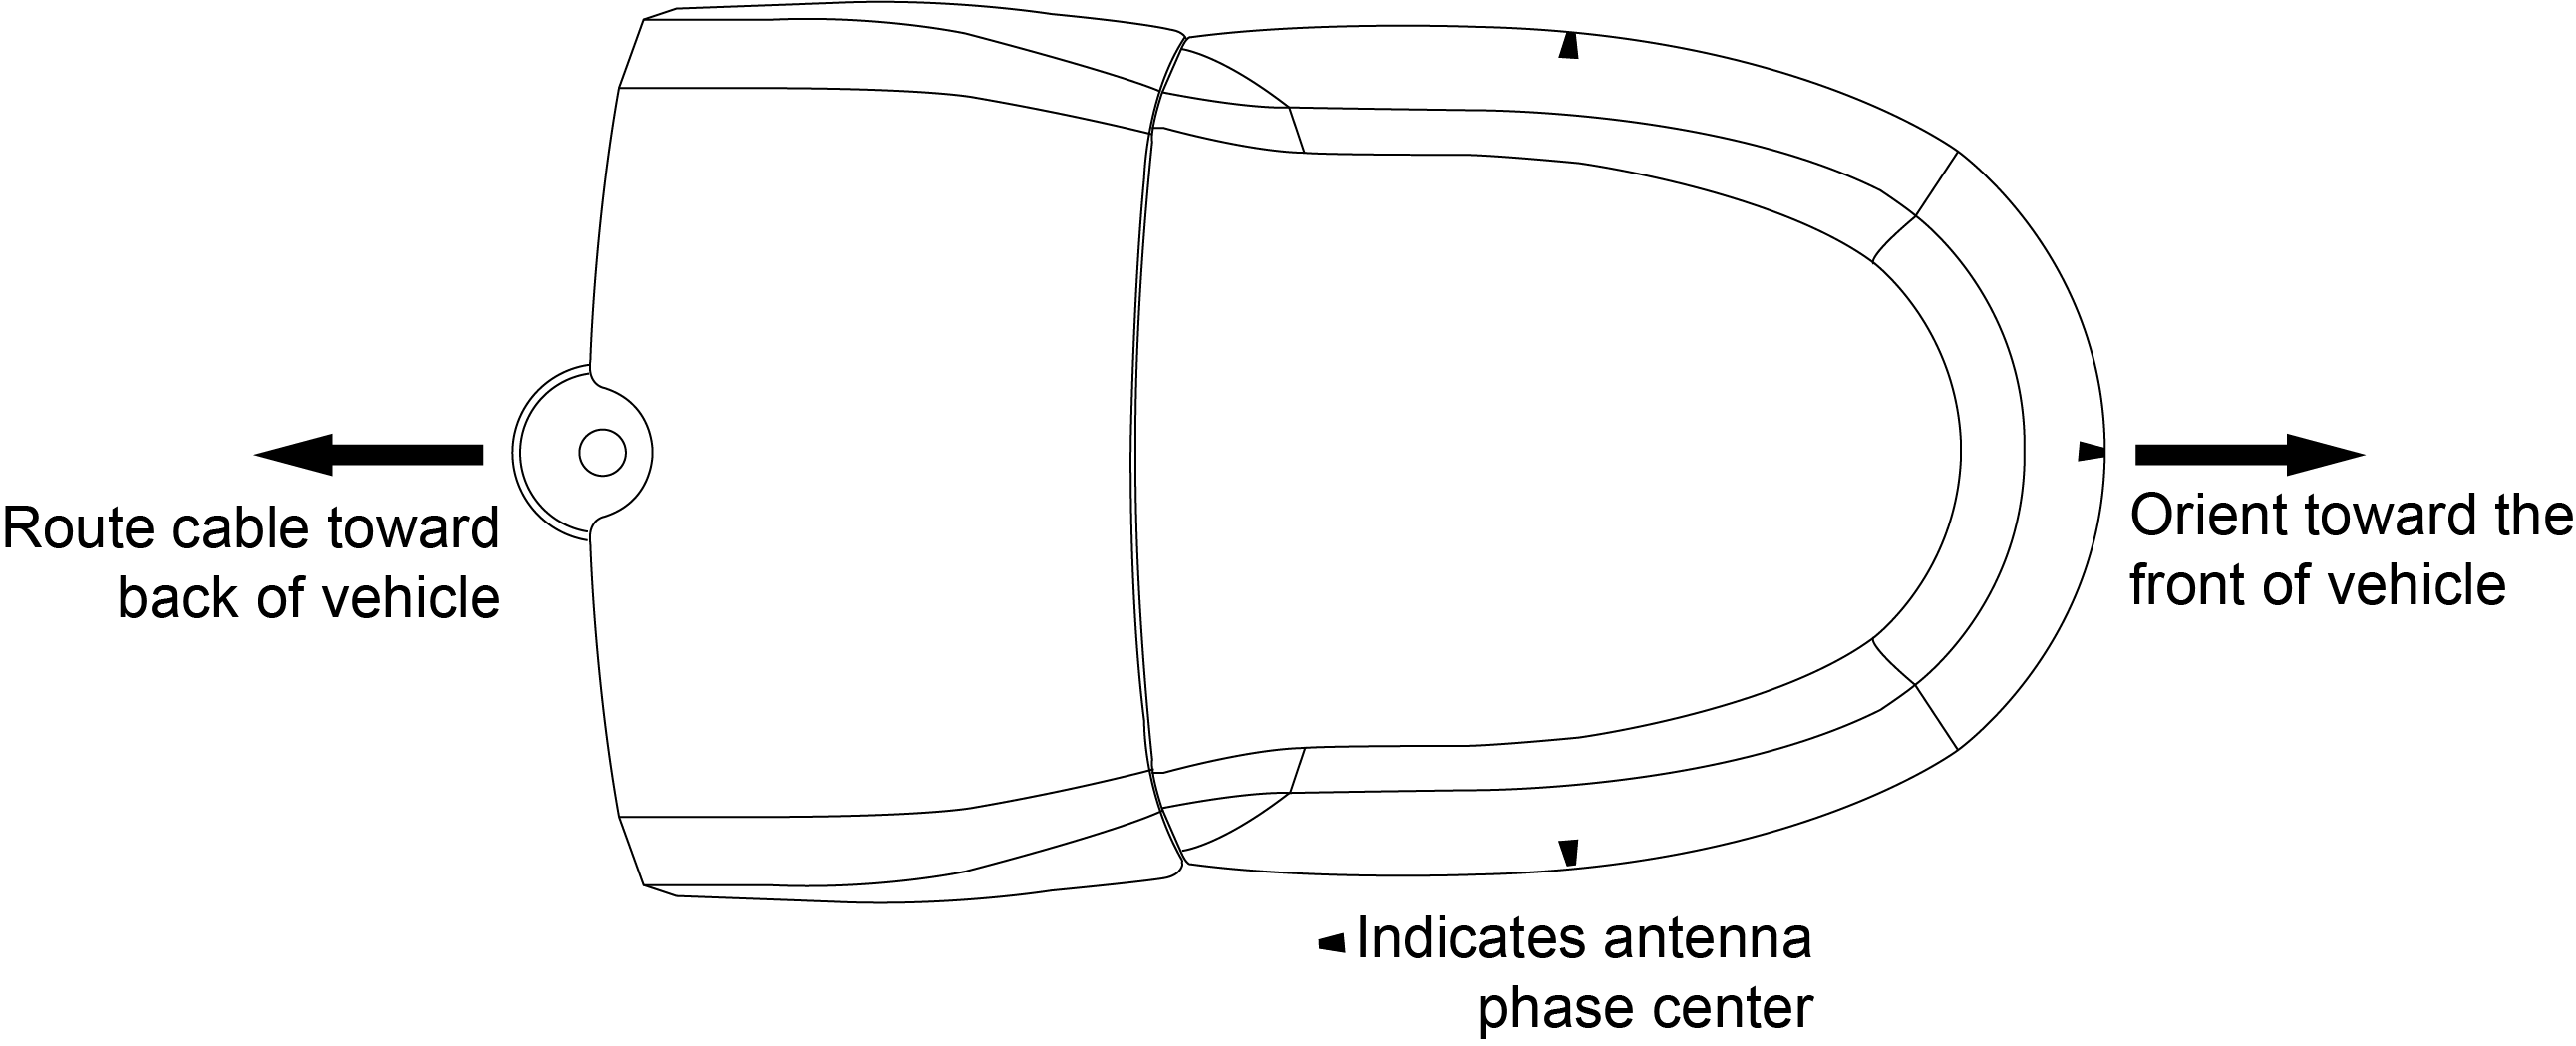
If installing on a vehicle, mount the SMART7 and RELAY7 on the vehicle roof, ideally close to the pivot point of the vehicle. The SMART7 and RELAY7 must be mounted with the connector facing the rear of the vehicle.
The SMART7 and RELAY7 must be rigidly secured to the vehicle to avoid errors caused by vibration and motion.
-
If installing in a stationary location, mount the SMART7 and RELAY7 in a location that has a clear view of the sky so that each satellite above the horizon can be tracked without obstruction. For more information, refer to An Introduction to GNSS available on our website at novatel.com/an-introduction-to-gnss.
SMART7 and RELAY7 Mounting Hole Locations
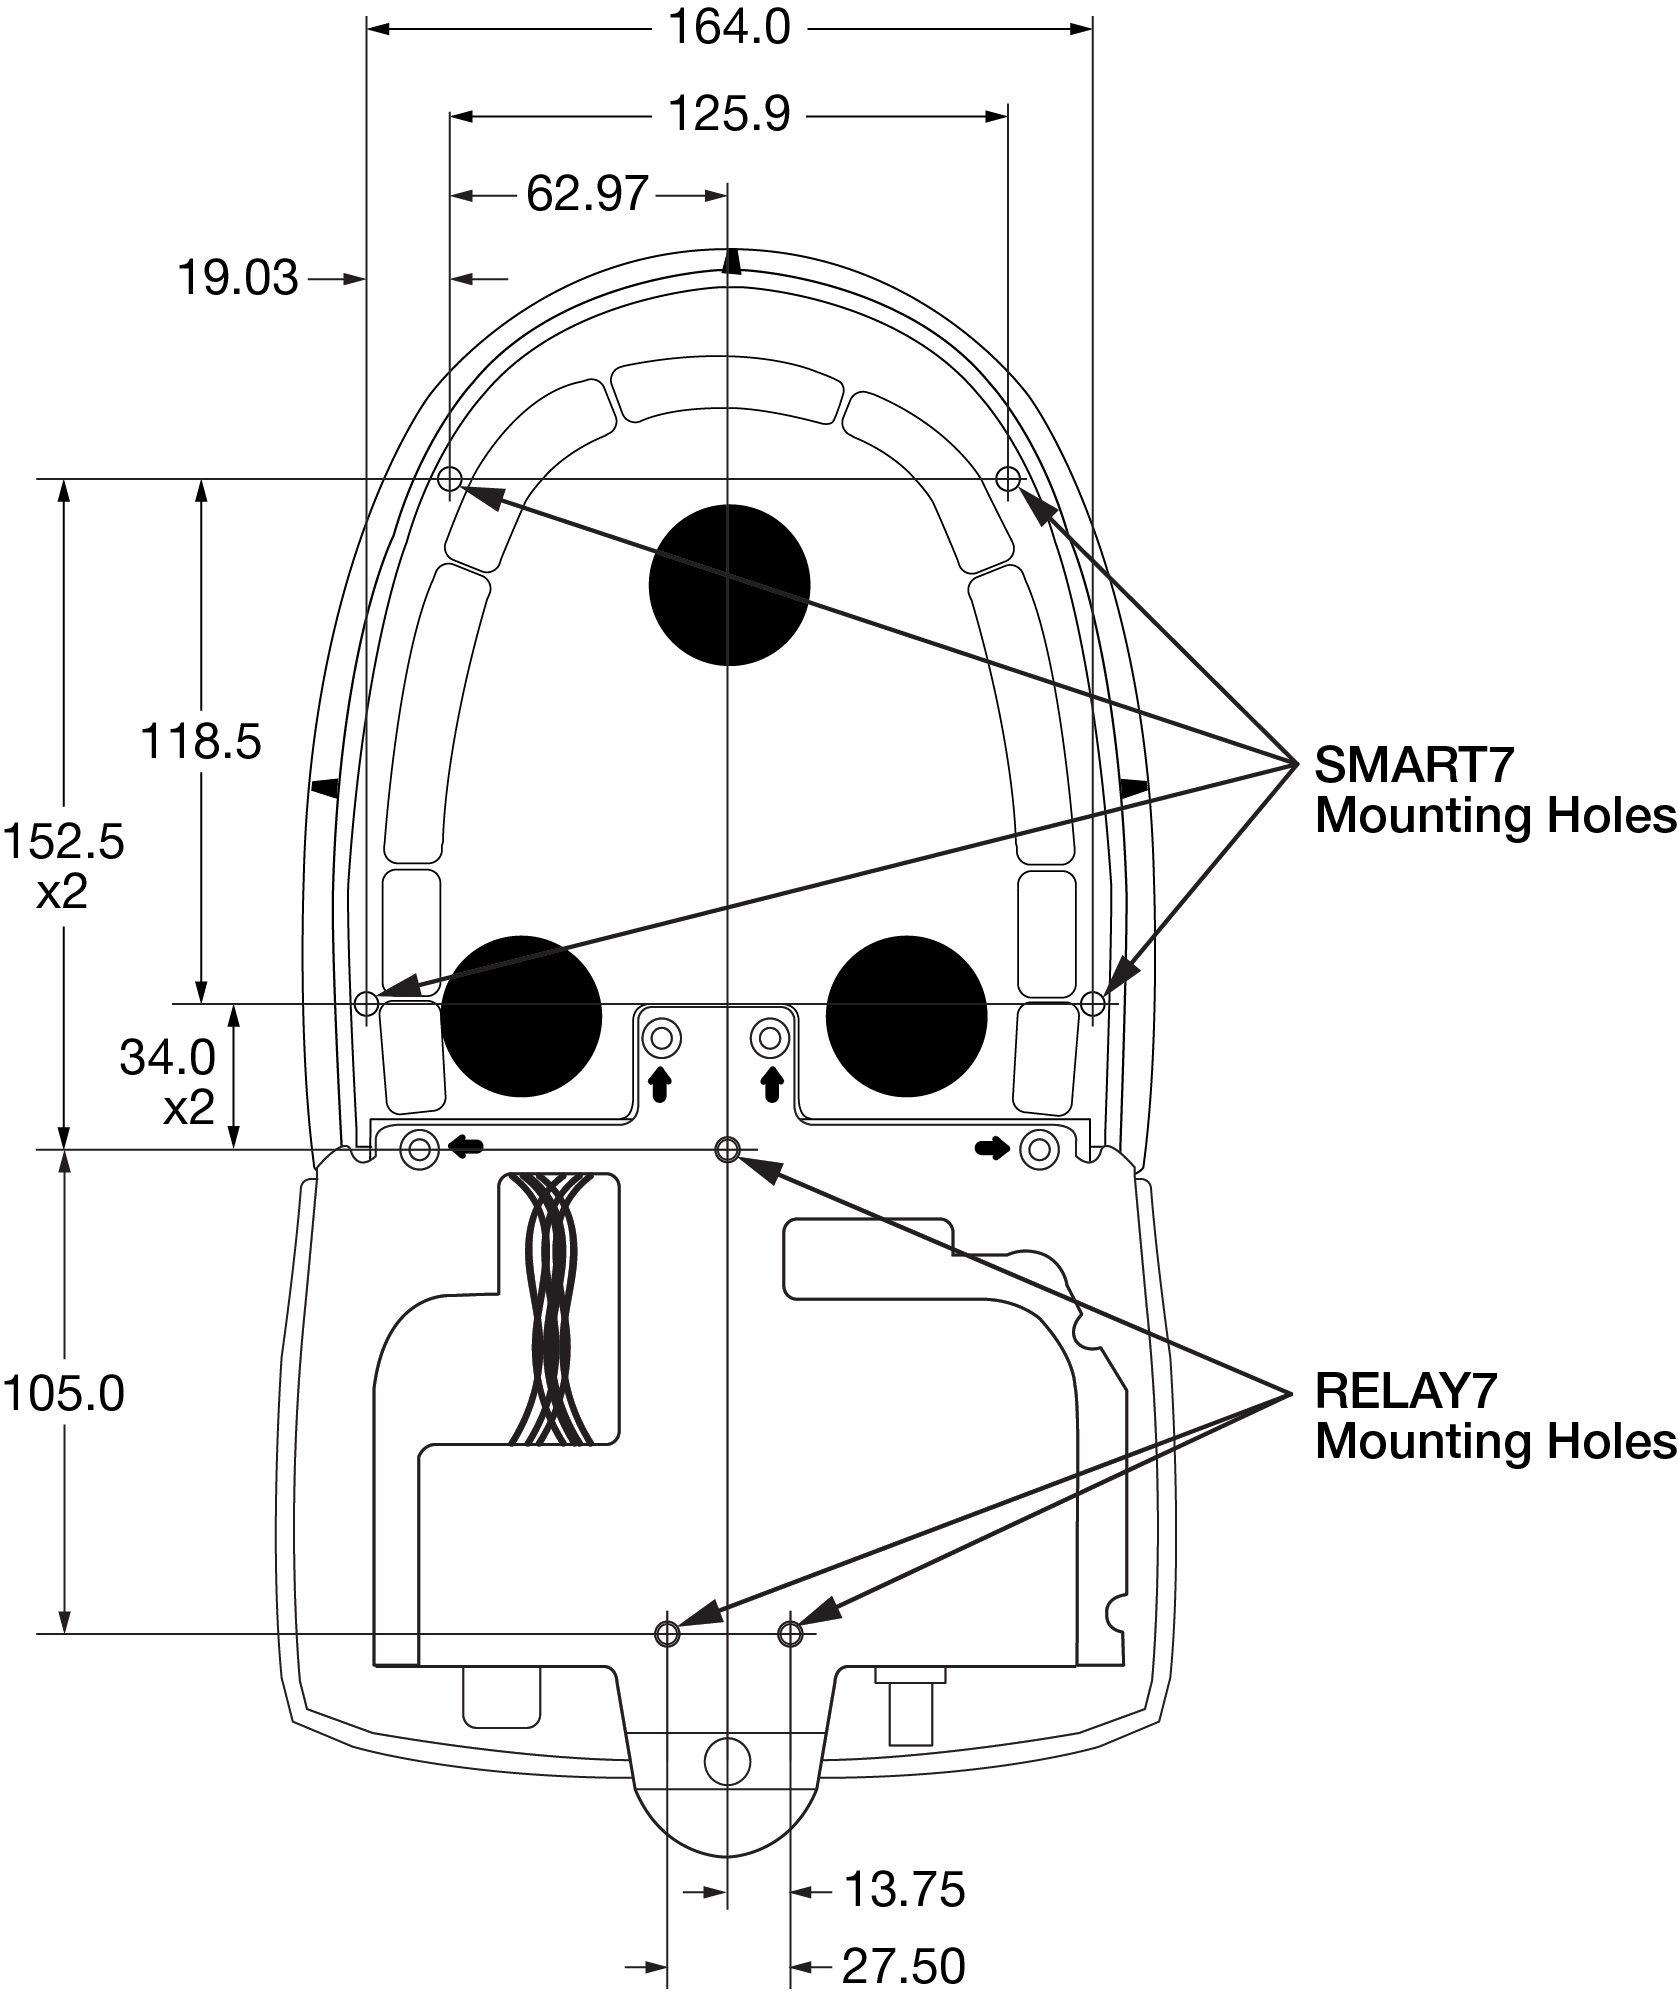
The SMART7 and RELAY7 mounting hole locations are shown in the following diagram.
SMART7 and RELAY7 Mounting Hole Locations

These mounting holes are intended for attachment to a metal plate. When attaching to a 2.5 mm to 3 mm thick metal plate, use four M4X0.7 thread X 12 mm length screws that pass through the plate and into the SMART7 and RELAY7 mounting holes. Torque the screws to 10 - 12 in-lbs.
If using a thicker mounting surface, select screws that penetrate into the mounting holes 6 mm (±1 mm).
