Static IP address configuration
|
Platform: |
OEM729, OEM7600, OEM7700, OEM7720, PwrPak7, CPT7, CPT7700, SMART7-I, SMART7-SI |
For a static IP address configuration, unique IP addresses are assigned to both the OEM7 receiver and the computer. TCP/IP is used for the connection in this simple network. This configuration can also be used in a bench test environment to confirm Ethernet functionality.
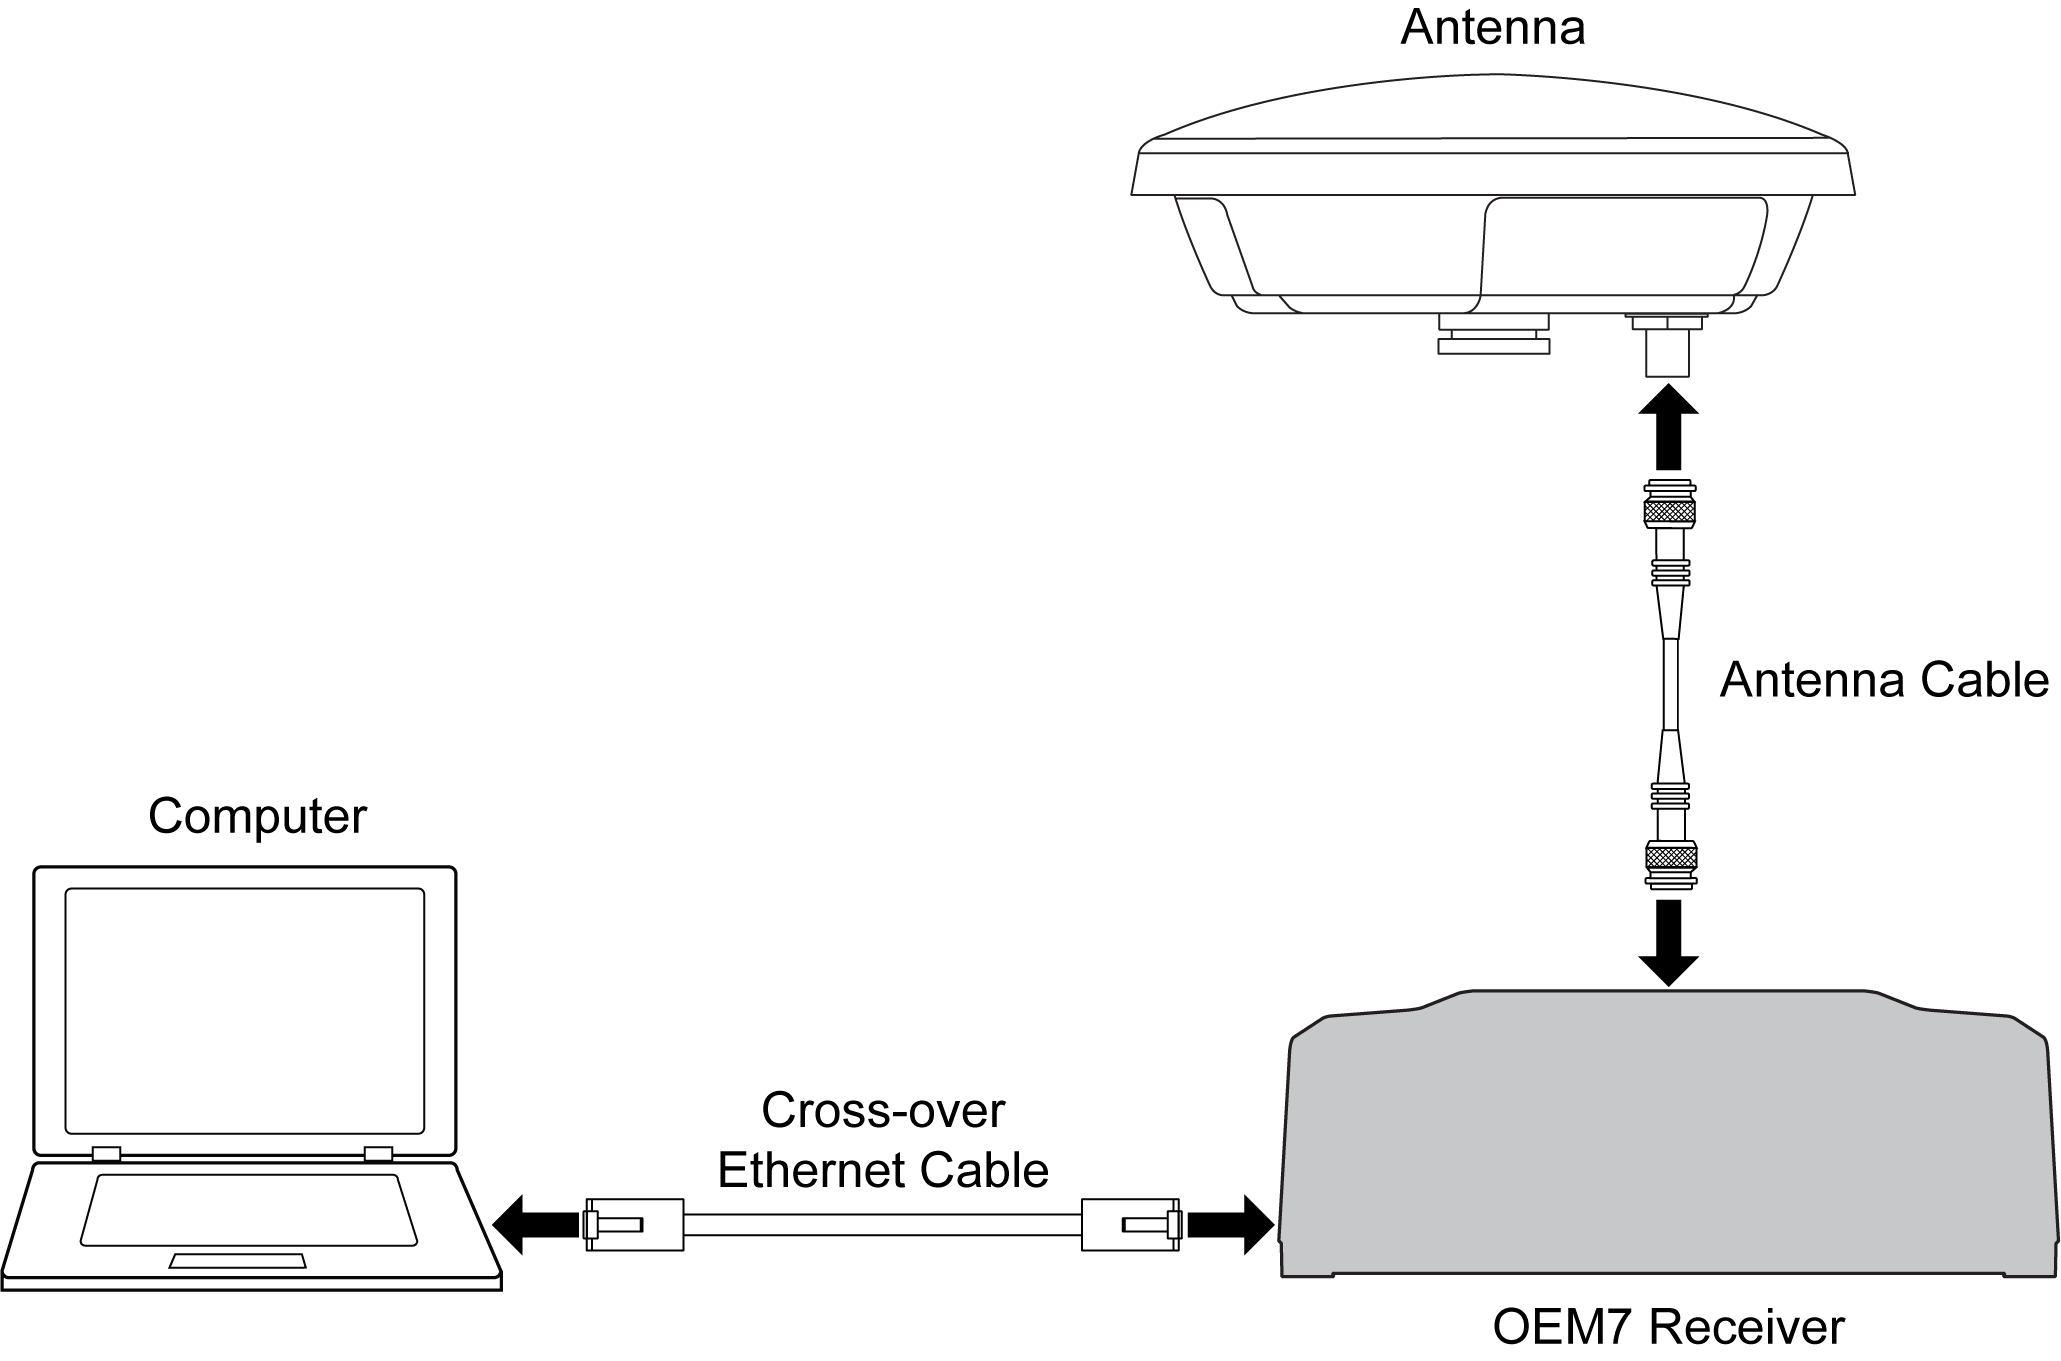
For connections when an OEM7 receiver uses a static IP address configuration, refer to Figure: Cross-over Ethernet cable configuration—OEM7 receiver.
Static IP address configuration—receiver
Follow these steps to set up a static IP address on the OEM7 receiver:
-
Connect a computer to the OEM7 receiver using a null modem serial cable
-
Establish a connection to the receiver using either NovAtel Application Suite or another terminal program. This connection is used to send the commands in this procedure to the receiver.
For information about using NovAtel Application Suite, refer to docs.novatel.com/Tools/Content/ToolsSuite/Overview.htm.
-
Enable the Ethernet port on the receiver by entering:
ETHCONFIG ETHA AUTO AUTO AUTO AUTO
-
Assign the TCP/IP port number used for the connection by entering:
ICOMCONFIG ICOM1 TCP :2000
-
Assign the receiver IP address, subnet mask and default gateway by entering:
IPCONFIG ETHA STATIC 192.168.74.10 255.255.255.0 192.168.74.1
The command assigns the following values to the OEM7 receiver:
IP address = 192.168.74.10
Subnet mask = 255.255.255.0
Gateway = 192.168.74.1These settings are examples only. The settings appropriate to your system may be different.
-
Save the new Ethernet settings by entering:
SAVEETHERNETDATA
-
Log the IPCONFIG command and confirm the TCP/IP configuration by entering:
LOG IPCONFIG ONCE
-
Configure your computer with a static IP address.
Refer to Static IP address configuration—Windows 7.
Static IP address configuration—Windows 7
Follow these steps to set up a static IP address on a computer:
-
Click Start | Control Panel.
-
Click Network and Sharing Centre.
-
Click the Local Area Connection link.
The Local Area Connection Status window appears. -
Click the Properties button.
The Local Area Connection Properties window appears. -
Select Internet Protocol Version 4 (TCP/IPv4) and then click the Properties button.
The Internet Protocol Version 4 (TCP/IPv4) Properties window appears. -
Click the Use the Following IP Address radio button, then enter the IP address, Subnet mask and Default gateway for the Ethernet port on the computer.
Ensure the Ethernet settings used for the computer are compatible with the Ethernet settings on the OEM7 receiver.
For example, the following settings are compatible with the OEM7 receiver settings used in Static IP address configuration—receiver:
IP address = 192.168.74.11
Subnet mask = 255.255.255.0
Gateway = 192.168.74.1 -
Click the OK button.
The Local Area Connection Properties window appears. -
Click the Close button.
The Local Area Connection Status window appears. -
Click the Close button.
-
Proceed to Confirming Ethernet setup.
Confirming Ethernet setup
-
Connect the computer to the OEM7 receiver using an Ethernet cross-over cable.
See Figure: Cross-over Ethernet cable configuration—OEM7 receiver. -
Connect to the receiver using NovAtel Application Suite or any third party terminal program that supports TCP/IP connections. Use the static IP address and port number assigned to the OEM7 receiver in Static IP address configuration—receiver.